It's pretty well known that ssh can be used to tunnel X11 sessions, typically from a server to your local workstation. This is extremely handy if you need to run an X program on a remote system on which you only have terminal/shell access. If you're a windows user, I recommend using Putty, and you can enable X11 forwarding very simply.


While all of this is really great and helpful in the extreme, it is covered in many places and isn't new. What I recently worked out, and want to share, is the solution to the following two problems:
Having logged in to a system, and set up your X11 tunneling, you lose your X11 tunnel if you:
1) su to another user
2) ssh to a new system
Both of these are dead handy things to be able to do. If you have to assume root privileges, for example, to run the command that generates an X session, you'll hit problem 1. If you need to switch to a user on a different system, because you don't have a direct connection to that server, you'll hit problem 2.
1 - How to maintain your X11 tunnel while su-ing to a new user
a) log in to your system as described above
b) check your environment DISPLAY variable:
-bash-3.00$ echo $DISPLAY
localhost:10.0
c) Discover what your session magic cookie is:
-bash-3.00$ /usr/openwin/bin/xauth list
hostname/unix:10 MIT-MAGIC-COOKIE-1 fca50d4504788a86d4b680f3eda4628e
d) su to new user:
-bash-3.00$ su -
Password:
root@hostname # DISPLAY=localhost:10.0
root@hostname # export DISPLAY
From the initial putty menu, note the options on the left, and expand the + next to 'SSH', under the 'Connection' category:

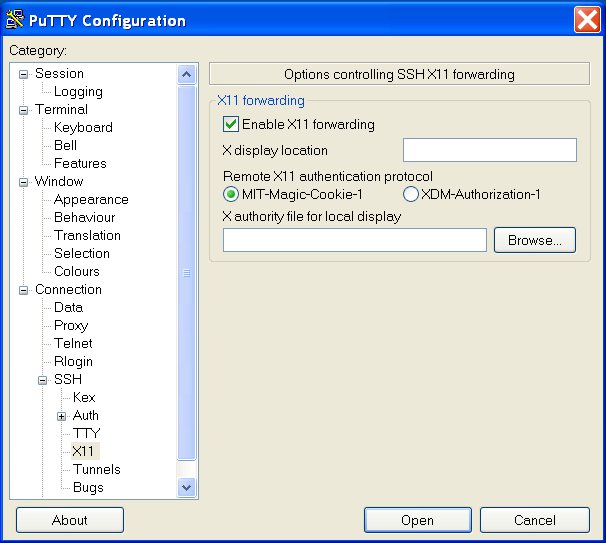
On the next page, you should tick the 'Enable X11 forwarding' tick box:


On the next page, you should tick the 'Enable X11 forwarding' tick box:
As soon as you log into the server, you should see a message saying that a new authority file has been created:

This has now set a magic cookie (no really) to authorise the server you have just logged into. If you're wondering what you've just authorised - you've just authorised the server to send X windows back through the ssl session to display on your computer. Naturally, you need an Xwin server such as Cygwin-X running on your system.
If everything is working correctly, your session should have an environment variable (DISPLAY) set to something very similar to localhost:10.0, and if you run /usr/openwin/bin/xclock, it should appear magically on your desktop:

While all of this is really great and helpful in the extreme, it is covered in many places and isn't new. What I recently worked out, and want to share, is the solution to the following two problems:
Having logged in to a system, and set up your X11 tunneling, you lose your X11 tunnel if you:
1) su to another user
2) ssh to a new system
Both of these are dead handy things to be able to do. If you have to assume root privileges, for example, to run the command that generates an X session, you'll hit problem 1. If you need to switch to a user on a different system, because you don't have a direct connection to that server, you'll hit problem 2.
1 - How to maintain your X11 tunnel while su-ing to a new user
a) log in to your system as described above
b) check your environment DISPLAY variable:
-bash-3.00$ echo $DISPLAY
localhost:10.0
c) Discover what your session magic cookie is:
-bash-3.00$ /usr/openwin/bin/xauth list
hostname/unix:10 MIT-MAGIC-COOKIE-1 fca50d4504788a86d4b680f3eda4628e
d) su to new user:
-bash-3.00$ su -
Password:
e) set your DISPLAY variable:
root@hostname # DISPLAY=localhost:10.0
root@hostname # export DISPLAY
f) set your magic cookie:
-bash-3.00$ /usr/openwin/bin/xauth add hostname/unix:10 MIT-MAGIC-COOKIE-1 fca50d4504788a86d4b680f3eda4628e
Congratulations - you should now be authorised again to send X11 commands to your local machine.
2 - How to maintain your X11 tunnel while ssh-ing to a new system
This is really easy - either of the following ssh commands works.
ssh -o "ForwardX11 yes" username@remotesystem
or
ssh -X -A username@remotesystem
